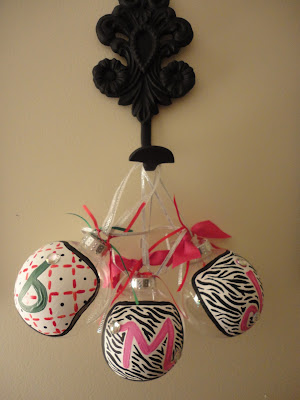
Girly Christmas Ornaments!
What you will need:
Paints and Glue
Rhinestones
Clear Bulb
1. Paint the area you're decorating with white. I used 3 coats.
2. Choose the color of paint you want for your letter and paint it on. I freehanded it, but you can pencil it if that makes you feel more comfortable.
3. Several coats of paint to make it a solid letter.
4. Add your pattern. The zebra stripes look overwhelming at first but they are actually very easy.
Start with a few lines, some long and some short. just make sure none of them are even or all that strait.
The great thing about this is even if one is a little wonky looking it will all disappear when they are all on there together.
5. Take your time making the stripes. Try to keep them the same distance apart from each other. If you want, you can make a few of them connect, but only a few... like below.
6. Keep going, they will look better as you go along.
7. Beautimus!
8. Add the black line along the edge of your white area to clean it up and make it have a more finished look.
9. Adding the bling is one of my favorite parts, it makes it have that extra flair! They are stick on, but I used tacky glue to secure them!
10. Add some ribbons to the top and then add one longer thin ribbon to hand it to the tree! No need fighting with those wire hooks that you are always misplacing!
A little close up.
I made an M and a J.
I really liked the way the J turned out, I used a little more puff paint in the mix to give the pinks a multi colored look.
There you have it! Simple and inexpensive Christmas Ornaments, personalized and stylish!
Who needs Santa when you have Hobby Lobby or Michaels!?
Shout out to Mary Blair who requested this adorable DIY. I was more than happy to do it! If anyone has a DIY Blog request don't hesitate to let me know!


Comments
Post a Comment